Our YouTube channel includes detailed installation guides, frequently asked questions, product overviews and lots more. We are always open to content ideas so please let us know if there is a topic you would like us to cover.
How to Shade a Deck
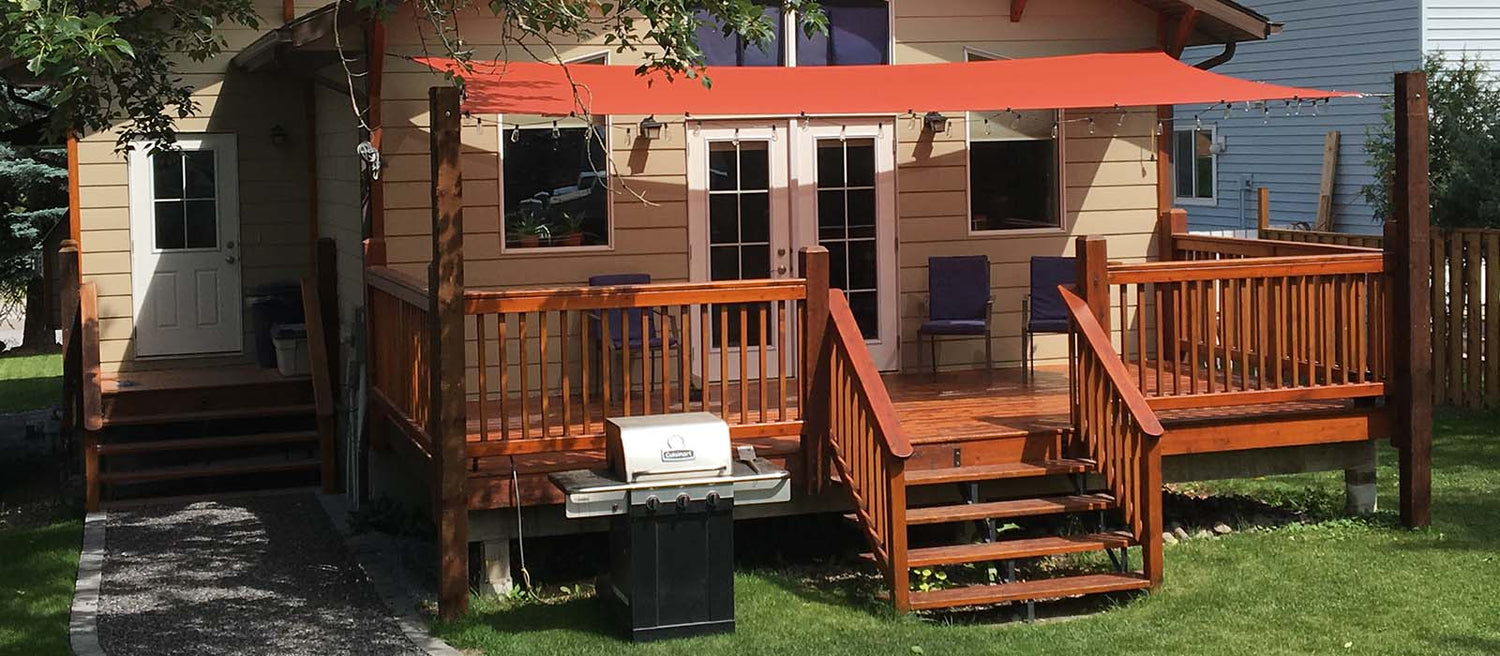
Your deck can be one of the defining features of your outdoor space—it’s where we place our BBQ, enjoy family dinners, and relax. It’s also a major investment, so ensuring it stays functional and comfortable throughout the summer is essential. If you’ve been wondering how to shade a deck, we offer a range of versatile solutions at Shade Sails Canada to help you do just that.
Not every deck is built the same, so choosing the right shading option means considering your construction stage, sun exposure, post height, and available anchor points. This guide walks you through each of these steps so you can find the best solution for your outdoor space.


Construction Status
Incomplete Deck
If you’re planning your deck from scratch, you’re in the ideal position. You can design posts and anchor points with the force of a tensioned fabric structure in mind. This ensures your shade system will not only look great but also perform safely and effectively.
Completed Deck
No worries if your deck is already built—this is the most common scenario. However, you'll need to assess how strong your current structure is. Tensioned fabric like shade sails can apply significant force, so if your railings or posts aren’t strong enough, you might need to add new anchor points or even consider using a framed pergola.

Planning Tips & Position of the Sun
Custom shade sails offer maximum flexibility and performance. If you're on a tighter budget, standard sails can still work well—just note you'll need to plan around their fixed dimensions.
The sun's angle plays a huge role. During mornings and evenings, low-angle sunlight can be annoying. A square or rectangular shade sail gives you more flexibility to block sunlight during these times by adjusting the heights of your anchor points.
Bry's Tip: Use the Traveller System for added flexibility—it lets you adjust your sail's position based on the sun.


Height of the Deck
Ground-Level Decks
If your deck is at ground level (aka “at grade”), post and footing requirements are straightforward. You can use a pergola to eliminate the need for large footings, and even bolt it to your deck. This is also a great setup for pairing horizontal shade or privacy panels.


Upper-Level or Raised Decks
Raised decks add complexity due to increased structural stress. Posts will need to be thicker, and footings more substantial. Avoid attaching to railings—they usually aren’t strong enough. Knee posts can help transfer load to the deck’s frame and increase usable shaded space.


Posts, Anchor Points & Cabling
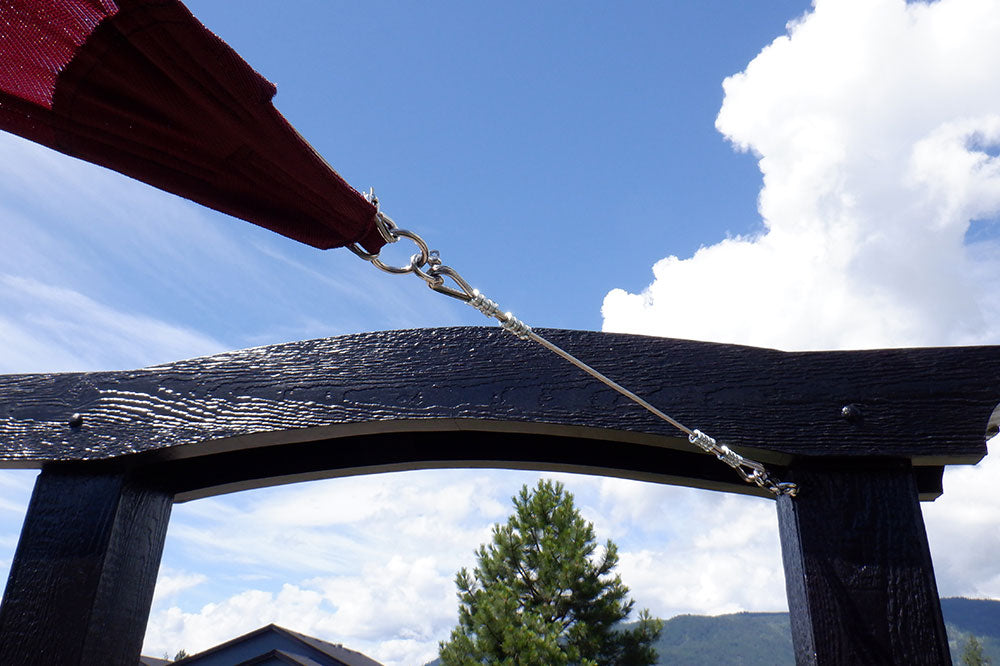
When posts aren’t feasible or desirable—especially on finished decks—running cables between anchor points offers a flexible alternative. With this method, your shade sail doesn't need to connect directly to a post. Instead, you can offset the corners by using tensioned stainless steel cable, allowing you to anchor to nearby walls, beams, or stronger structures outside your immediate deck area.
This approach is ideal for maximizing shaded space without cluttering your deck with multiple posts. It also adds design versatility, especially when working with custom shade sails. Be sure to use durable, marine-grade hardware like turnbuckles and eye bolts to maintain proper tension over time. If you're unsure how far you can offset or what hardware to use, our team can help with layout advice or complete cabling kits designed for your specific setup.

Using Existing Structures
One of the most effective ways to cut cost and reduce installation time is to use your home as an anchor. Our wall plates and corner brackets are perfect for mounting on brick, siding, or wood. Just make sure your wall can handle the tension.

Posts and Footings
If your deck doesn’t already have suitable structures to anchor your shade sail, adding dedicated posts is often the best solution. For optimal clearance and tension, it’s recommended to install these posts outside of the shaded area, allowing the sail to stretch freely over the space without any obstructions. This setup provides a more open and airy feel, while also reducing the number of supports that interfere with your usable deck space.
In cases where installing posts around the perimeter isn’t feasible, they can be mounted through the deck itself. While this approach is less ideal, it can work well with proper reinforcement. Be sure to avoid attaching shade sails to railings or non-structural parts of the deck, as they typically can’t handle the tension. When in doubt, consult with a professional or use structural knee bracing or guy wires to ensure long-term stability and safety.
FAQ: How to Shade a Deck
Can I add shade if my deck is already built?
Yes! Custom shade sails or pergolas can be added to existing decks with the right reinforcements. You may need new posts or hardware depending on your deck’s strength.

What’s the best way to block evening or morning sun?
Adjustable systems like square sails with varying height corners or the Traveller System are excellent for targeting low-angle sun.
Can I use a shade sail over a raised deck?
Yes, but you’ll need stronger posts and possibly knee bracing to handle the extra stress caused by elevation.
What if I don’t want to dig footings?
Use a pergola-style frame. These can be bolted directly to your deck and still support a tensioned structure if designed properly.
Conclusion
Creating a shaded, comfortable, and functional deck space is entirely achievable with the right planning and materials. Whether your deck is still under construction or already completed, understanding factors like sun positioning, deck height, structural integrity, and proper anchor placement will help you choose the best shading solution for your needs. Custom shade sails provide the highest degree of flexibility and performance, especially for unique or challenging layouts, while pergolas and existing structures can also serve as effective anchor points. By considering these key elements and using reliable hardware and installation practices, you’ll not only protect your investment but also enhance your outdoor living space for years to come.
