Our YouTube channel includes detailed installation guides, frequently asked questions, product overviews and lots more. We are always open to content ideas so please let us know if there is a topic you would like us to cover.
How much should I slope my shade sail?
Shade sails are a smart and stylish way to create comfortable outdoor spaces, offering protection from harsh sunlight and adding a modern look to patios, gardens, and public areas. But beyond appearance, proper installation—especially getting the slope right—is essential for long-term performance. A well-angled sail promotes water runoff, prevents fabric sagging, and improves stability in windy conditions. In this guide, we’ll explain how to achieve the right slope and why it matters for building a shade system that balances durability, drainage, and structural strength.
Understanding the Importance of Slope
The slope—also called the pitch—of a shade sail is a critical part of proper installation. Without the right angle, water can collect in the middle of the sail during heavy rain, causing it to sag or stretch. Over time, this pooling can damage the fabric and lead to early wear.
A well-angled sail doesn’t just improve drainage; it also boosts structural performance. By reducing tension stress and wind load, the correct slope helps your sail stay secure and stable, especially in exposed areas. It's one of the simplest ways to improve long-term strength and help your system hold up in unpredictable weather.
Determining the Optimal Slope
In most cases, a slope of 20% or more is ideal. That means for every ten feet of horizontal span, the height should vary by about two feet. This pitch helps ensure proper water runoff and keeps the sail tight.
However, the best slope depends on your specific setup. Larger sails, unusual shapes, and open locations exposed to high winds may need steeper angles. The slope should be planned based on your local climate, layout, and whether your sail will be fixed to a structure or supported entirely by posts. In all cases, the goal is to create a clean, tensioned surface that sheds water and holds firm in changing conditions.
Types of Shade Sails and How Slope Affects Them
Shade sails are available in several shapes—most commonly triangular, square, or rectangular—and each one requires a different sloping strategy for effective performance.
-
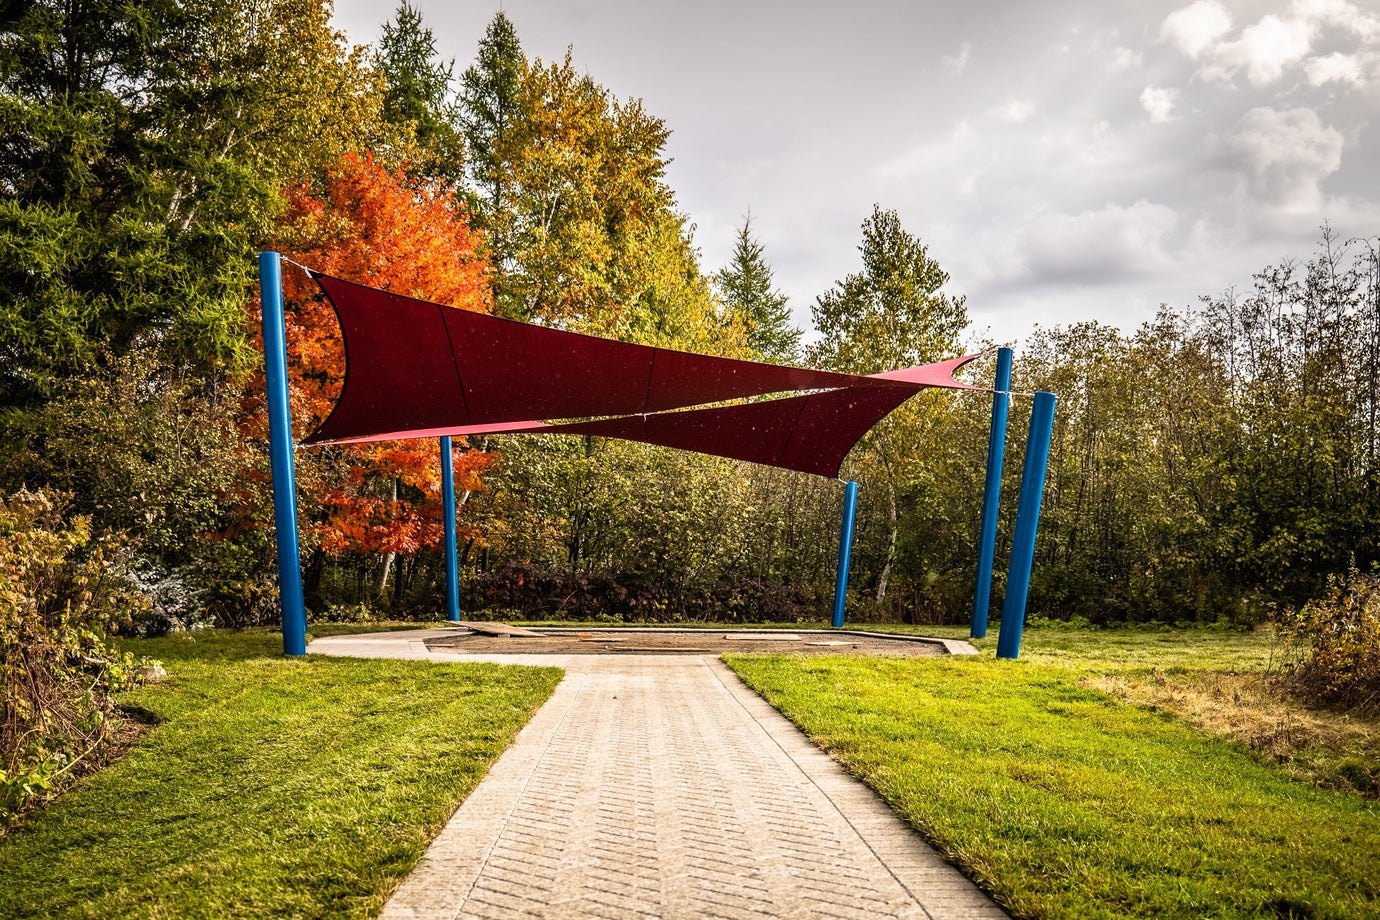
Triangular Shade Sails: These are popular for their simplicity and ease of installation, as they only require three attachment points. To maintain tension and prevent water from pooling, at least one corner should be set noticeably lower than the others. This angled design allows for proper water runoff and reduces strain on the fabric during windy conditions.
-
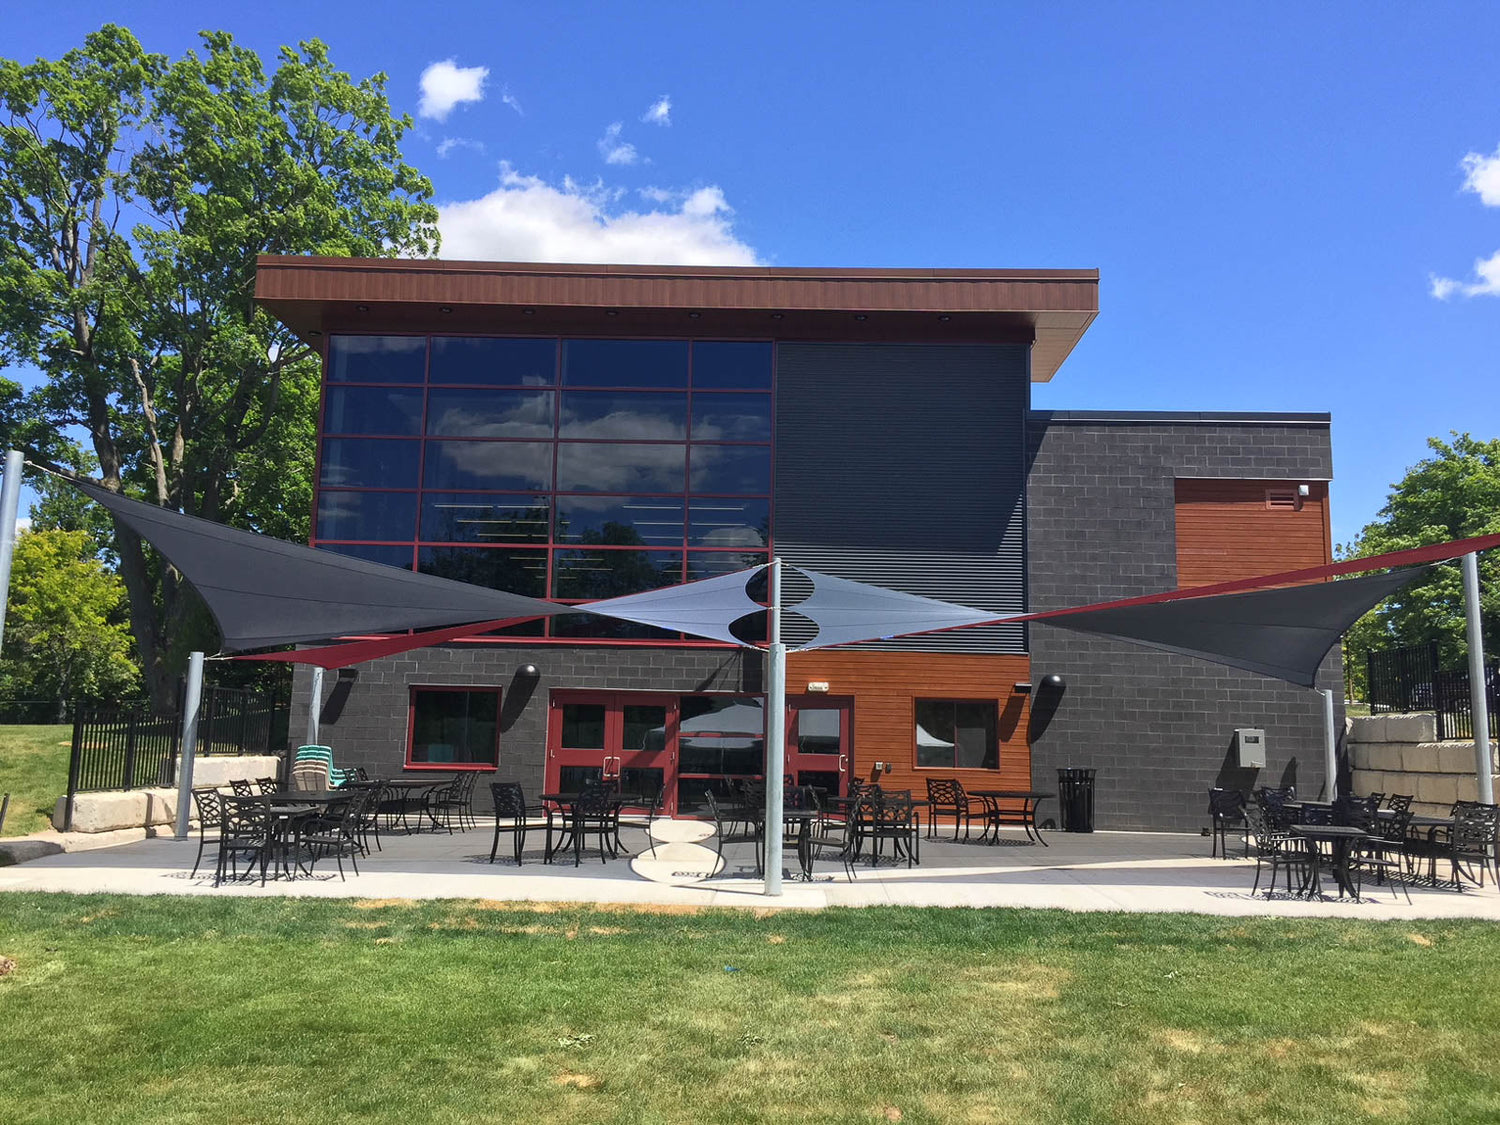
Square and Rectangular Shade Sails: These larger sails need a more deliberate slope to remain stable and effective. A good rule of thumb is to lower two opposite corners to create a diagonal slope across the sail. This approach helps shed water efficiently and supports a taut, wind-resistant surface, which is especially important in open or exposed areas.

Installation Tips for Achieving the Correct Slope
-
Plan Anchor Point Locations: Before setting up your shade sail, take time to assess the layout of your space and choose reliable anchor points. These might include buildings, posts, or mature trees. Make sure all attachment locations are strong enough to handle the tension created by the sail, especially during wind and rain.
-
Use Adjustable Tensioning Hardware: Adding turnbuckles or other adjustable fittings gives you more control over the slope and tightness of the sail. This flexibility is helpful for fine-tuning the angle after installation, particularly if the ground shifts slightly or if environmental conditions change over time.
-
Factor in Sun Exposure: While the primary goal of slope is to manage rain runoff and enhance stability, sun direction matters too. Position your sail so it offers the most shade during peak sunlight hours, especially in the afternoon. This ensures both comfort and long-term protection from UV exposure.
Additional Factors Influencing Installation
Material Selection
The type of fabric you choose affects both the longevity and performance of your shade sail. Two common materials are high-density polyethylene (HDPE) and polyester. HDPE is breathable and offers strong UV protection, making it a solid choice for hot or dry climates. Polyester is more water-resistant, which helps in wet environments, but it doesn’t allow as much airflow and may retain more heat.
Climate Considerations
Your local weather conditions should guide both your material choice and how you install the sail. In areas with frequent rain, a steeper slope helps water drain off quickly and prevents sagging or stretching. In regions exposed to strong winds, a more durable fabric combined with reinforced anchor points can help the sail stay secure under pressure. Adjusting the slope and tension with your climate in mind improves overall performance and helps your structure last longer.
Maintaining Your Shade Sail
Regular Inspections
Check your shade sail every few months for signs of wear, especially around the edges and attachment points. Look for fraying, loose stitching, or rusting hardware. Catching and fixing small issues early helps avoid larger repairs and extends the lifespan of your sail.
Cleaning and Care
To keep your sail looking its best and performing well, clean it with mild soap and water. Use a soft brush to remove dirt or debris. Avoid bleach or strong cleaners, as these can weaken the fabric and reduce its resistance to sun and weather over time.
Seasonal Adjustments
In regions with harsh winters, heavy snowfall, or seasonal storms, it's smart to adjust the tension or take down the sail entirely during the off-season. Proper storage and reinstallation help preserve the material’s strength and reduce long-term stress on anchor points.
Expanding Your Outdoor Space with Shade Sails
Beyond Functional Benefits: Shade sails are not just functional; they can transform an outdoor area into a visually captivating space. By experimenting with different colors, shapes, and configurations, you can create a unique ambiance that reflects your personal style.
Integration with Other Outdoor Features: Consider integrating shade sails with other outdoor features such as lighting, plants, and furniture. This can enhance the overall appeal and usability of your space, creating a cohesive and inviting environment.
Shade Sail Essentials: What You Might Not Know
Can I install a shade sail on an uneven surface or sloped yard?
Yes, but you’ll need to adjust post heights to maintain proper tension and slope across the sail. Custom-sized sails are often better suited for sloped or irregular terrain.
How do I prevent my shade sail from flapping in high winds?
Flapping usually means the sail isn’t tight enough. Use turnbuckles or tensioning hardware to ensure the sail is firm and wrinkle-free. A well-tensioned sail is quieter and more resistant to wind damage.
Should shade sails be left up year-round?
That depends on your climate. In mild regions, they can stay up year-round. In areas with snow or strong winter storms, it’s best to remove them during the off-season to protect the fabric and hardware.

Conclusion
Getting the slope right when installing a shade sail is key to its performance and long-term durability. A proper angle helps prevent water buildup, reduces wind stress, and keeps your sail looking sharp. By factoring in material selection, local weather, and the layout of your space, you can build a shade system that’s both functional and visually appealing.
Whether you're upgrading a backyard or designing a public outdoor area, shade sails offer a flexible, modern solution that balances strength and style. For more guidance on setup, maintenance, and design tips, explore our installation tutorials and product overviews on our YouTube channel. We’d love to hear your questions or suggestions for future content.